If you change your CPE (Consumer Placed Equipment) like Modem or Router from your Providers thingy to your own Router you may face the problem that it is not working as intended. Some Providers, especially on some GPON Fiber, using Tagged VLANS. This is also very common for some DSL Providers using PPPoE. So in case you want connect e.g. a pfSense as your main Router, without bridging the existing CPE unit, you need to set it up first – no plug an play DHCP and done.
In my Example I show you how to Setup a pfSense without a Bridged ISP Router in front. What we’re doing: Setup WAN with PPPoE over a Tagged VLAN on the pfSense box without any switch or Bridge in between.
So first check the papers you received from your provider about PPPoE Configuration or ask for them. German Telekom often require VLAN PVID 7 for their DSL PPPoE. Unfortunately in pfSense this is not just a form field to fill in, you need to setup a VLAN first.
Before we start, don’t connect the Internet Line before Step #3
1. Creating the VLAN
In the pfSense Web UI go to Interfaces > Assignments there you can choose the Tab VLANs and add a new VLAN. Importance here is to add it to the right Parent Interface, so make sure to choose the Interface where your WAN will be connected to. In my Case and Example mvneta2.
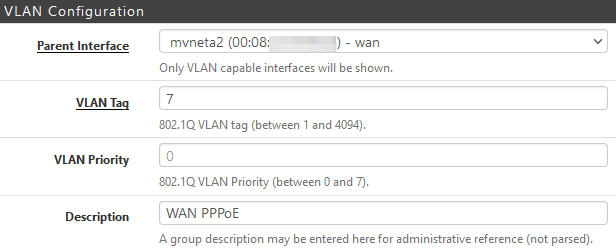
As a VLAN Tag we choose the VLAN from the ISP Information, in my case (Telekom DSL) it is VLAN 7. Could be different, US CenturyLink for Example use VLAN 201. VLAN Priority leave empty, do not set this, it will not help you to make your connection magically better.
2. Setting the WAN Interface to PPPoE
In the pfSense Menu go to Interfaces > WAN; Here change the General Configuration to PPPoE, keep default for other settings.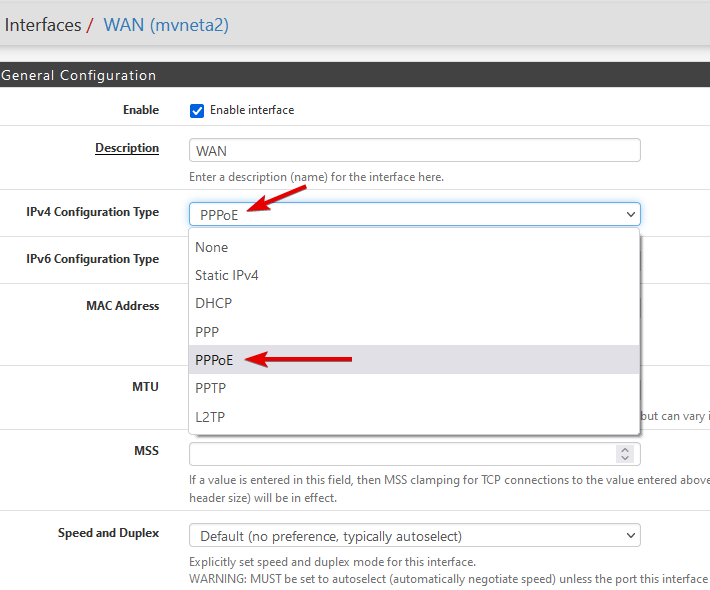
Scroll down and fill in the PPPoE Username and Password.
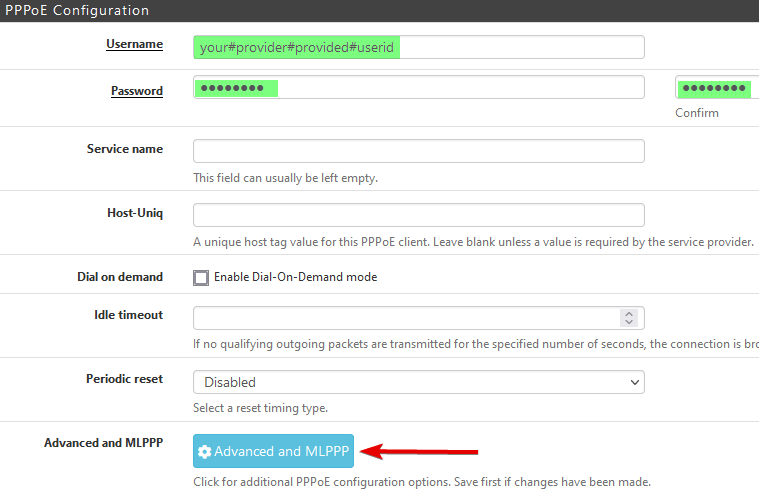
Take care here, some Providers like Telekom DSL need a special username which consists of your customer ID. (Telekom: [email protected]) But this is different for every ISP.
3. Assigning the VLAN to PPPoE WAN
After entering the PPPoE Credentials in the 2. Step, klick the Advanced and MLPPP Button. In the following Dialog choose PPPoE as Link Type and choose the previous created VLAN (WAN PPPoE) again enter your PPPoE Credentials and commit.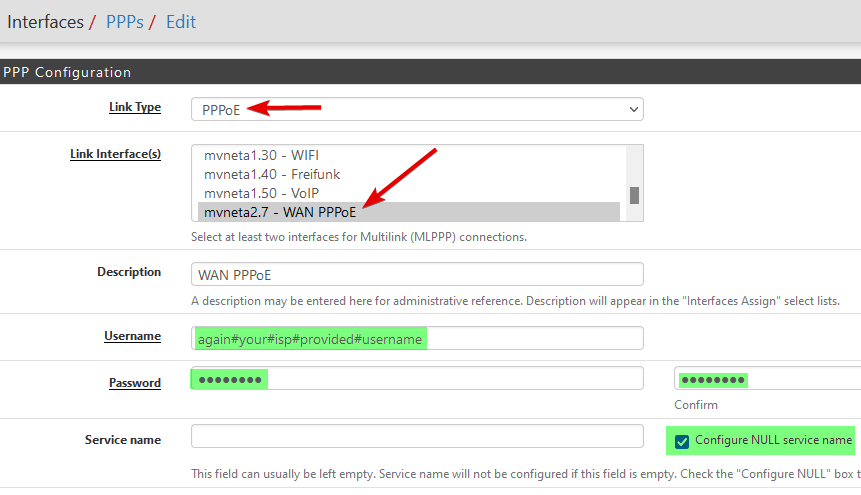
Now you can plugin the Network Cable to WAN and see under Status > System Logs > PPP if the Line comes up.

Comments